Category Archives: General

HXX GCS900-3D Digital Readout: new addition to my small lathe

A nice offer from the famous “Shenzhen Hengxingxing Precision Instruments Co., Ltd.”, or, HXX in short, lured me into buying a “retro-style” DRO for my lathe. There are all kinds of touch-screen DROs available, and I have the lathe connected to LinuxCNC including a DRO display, but nothing beats the charm of 7 segment LED displays and some buttons in terms of productivity and handling convenience in a workshop with oily and dirty hands.

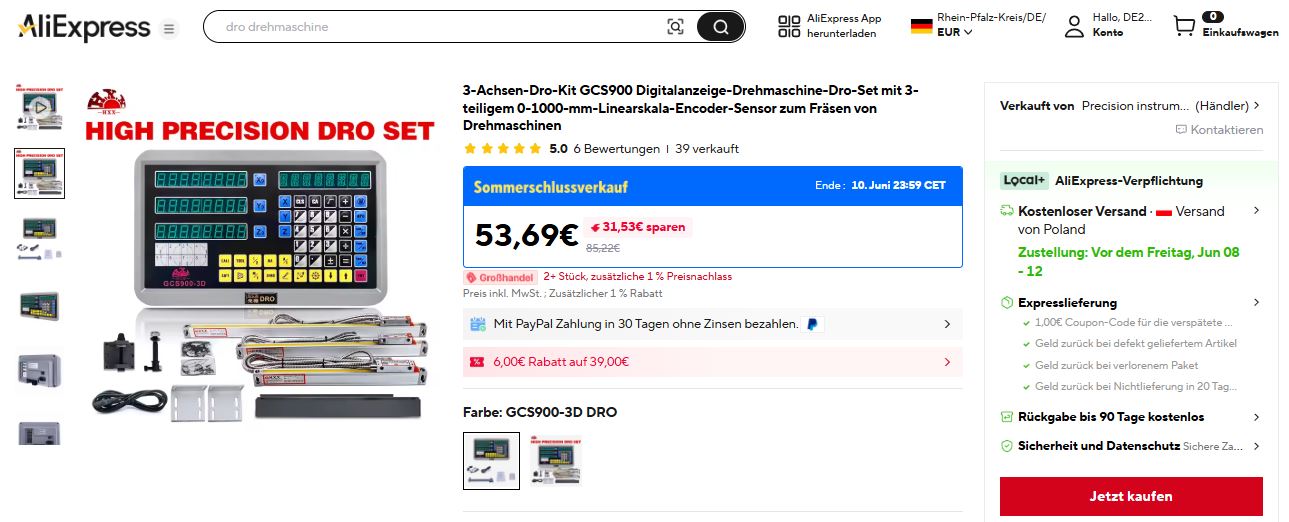
The offer, just a little over 50 EUR, shipping from Spain – so there is no risk of customs duties or value added taxes and similar, all is included.

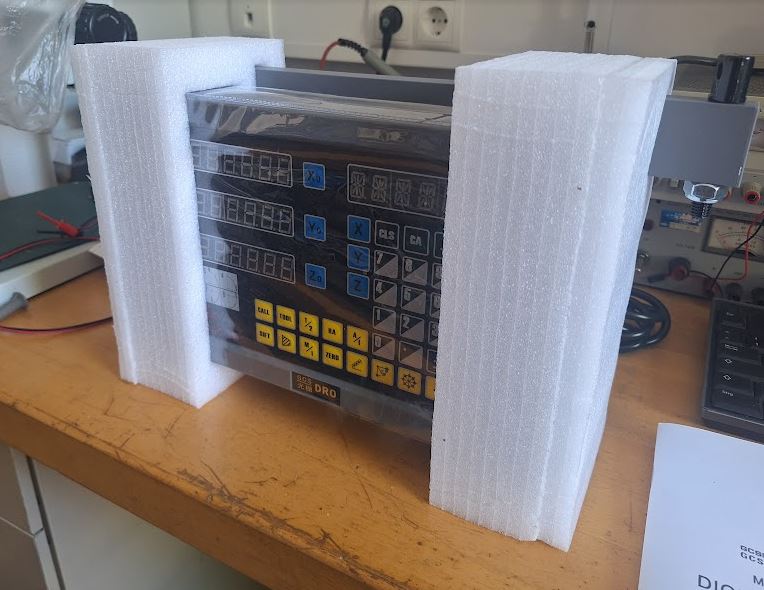
The device came well packaged, in a strong box, with foam padding, in a plastic cover. A paper manual is included.

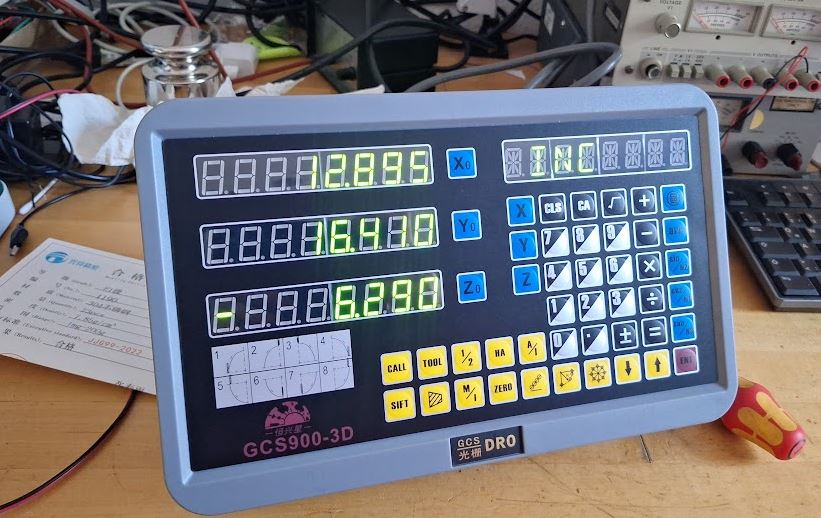
Surely, I needed to open it and check it out before use. There are three 8 digit displays (XYZ) and an 8 digital alphanumeric display on top. Many function keys and a build-in calculator, so we don’t have to scroll through some menus but can access each function by pushing a button the old school way.

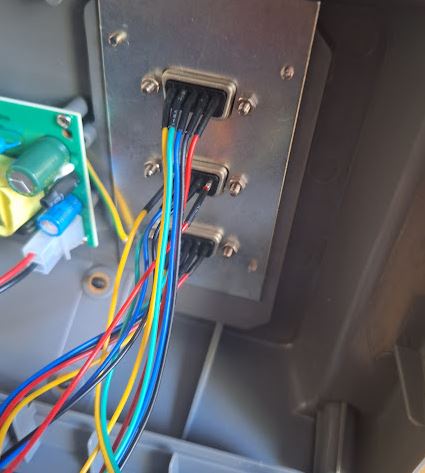
The connectors are wired for a typical Chinese DRO pinout: Pin1 5 Volts, Pin 2 Ground, followed by A B and Reference. Sino and other common brands use different pinouts, but you could easily solder the wires as you like. There is a metal plate that holds all the connectors, so in very special cases, it is even possible to fit some completely different connectors without harming the original case of the DRO.

The seller was very concerned and helpful, because I ordered the display without glass scales (I have these already installed) and contacted me proactively to inform about the pinout and connectors. Very nice customer service. There can be various comments and thoughts about buying such equipment from China, but so far I have only the best experience – try buying from a German company: they will charge you an arm and a leg, you can’t expect to reach anyone with any know-how except the list price by phone, messenger or email, and they may eventually respond that all is proprietary and they won’t help you for your specific case. Eventually, shipping and handling would cost more than the total cost of the AliExpress purchase.

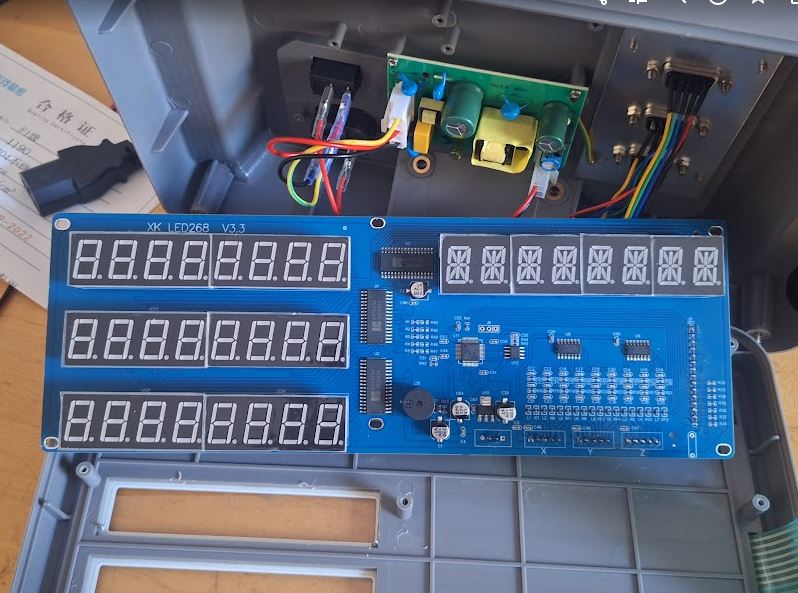
The signal first passes through some low pass filter and protection circuit: a 10 k resistor, and inductor, a R-C filter and current limiting resistors.

The filtered signal is further conditioned by a 74HCT14 Schmitt trigger to clean up the edges. I use the same chip for my own DRO signal conditioning, a good and cheap choice. Furthermore, these are just common SOIC parts, easy to fix (rather than some trigger input of a programmed microcontroller).

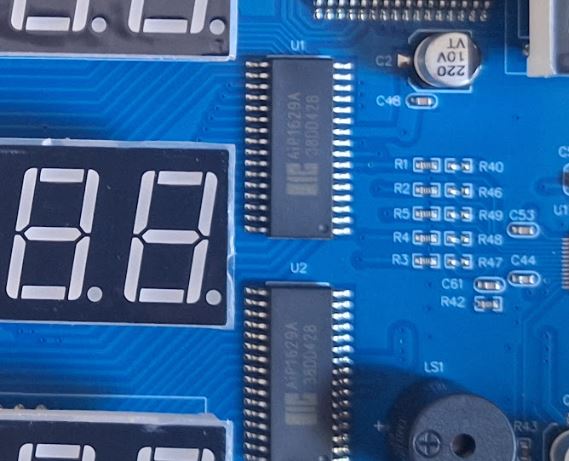
The processor is an ARM32 type, ARM Cortex-M0+ core 32-bit microcontroller, quite powerful for the application.

The display is driven by AiP1629A drivers, these are 16-segment 8-grid LED drivers (and keyboard scanner, but this function is not used for this DRO application).

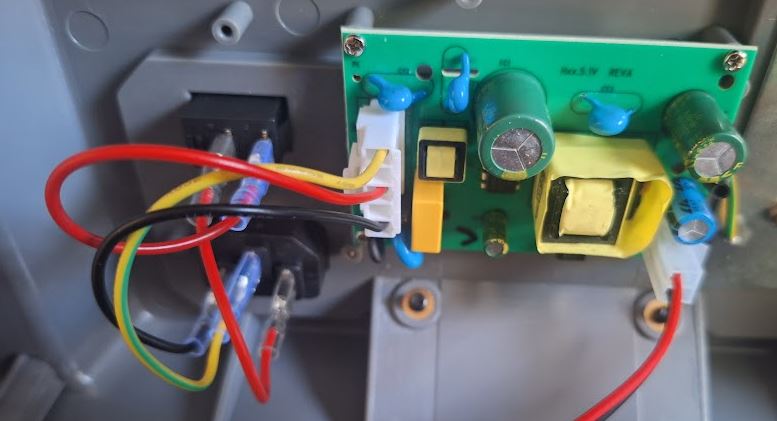
All is powered by a small switch-mode power supply, which appears to be of decent quality considering the isolation features and capacitor rating and quality level of the Y capacitors.

Now, for the connection to the lathe, we have do solder some wires to the junction box that currently links the DROs to a MESA Anything IO 7I92TF card.

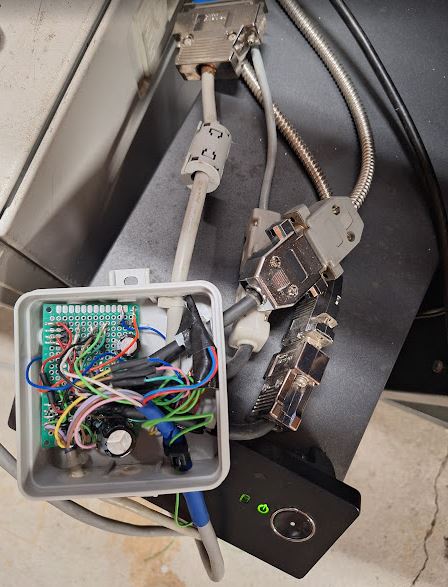
All a bit messy inside the box, but it is dust tight and has provided more than 10 years of good service in my workshop.

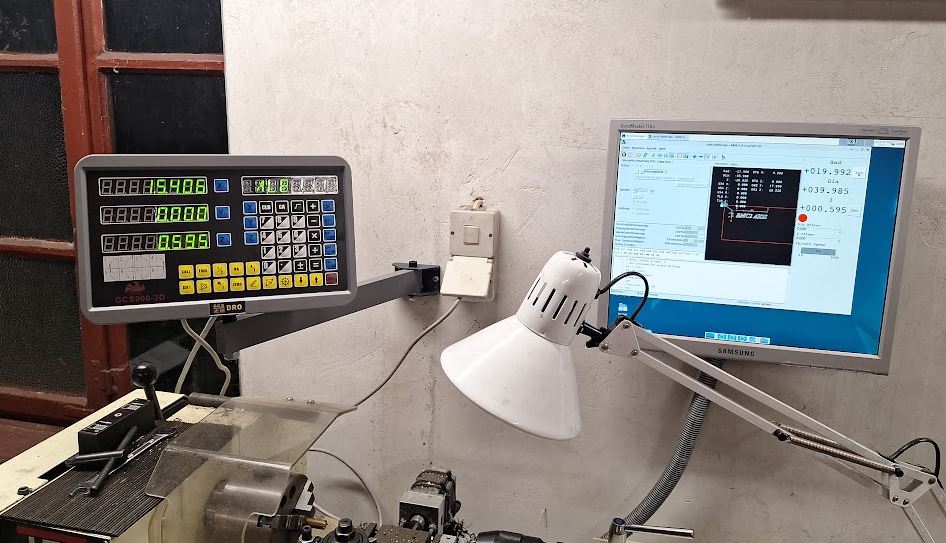
Finally, I can compare the readout the my LinuxCNC powered display (which interfaces to the MESA card via ethernet).

A few difficulties came up with the configuration of the DRO: the configuration menu cannot be accessed by pushing the A/I key or any other of the key “6 times” as often mentioned and also by instruction manual. Rather, you have to keep the “Enter” key pressed during start-up, and then scroll through the options with the arrow keys until you find the mode selection “MILL-3D” or similar, then push Enter until the desired mode shows up. By pushing the “.” key the settings are saved. For the resolution setting of the cross-slide, which uses a finer DRO, I had to use the 1 um resolution and a 250 mm/m linear compensation to get the correct reading. There are probably ways to set this differently, but it is working just fine this way. If you set up your lathe with glass scales, I highly recommend using a high-resolution scale for the cross slide, because working with diameters will half the resolution you get (10 mm travel corresponds to 20 mm diameter change!), and on a lathe, 10 um is a long distance when it comes to diameters of holes for bearings and similar.

There are also a few manuals about these DROs in my collection (the paper version seems to be a little outdated, anyway, good enought). If you need any of these and can’t get them from the supplier in time, just contact by email.

HXX GCS900 Instruction Manual

Sino DRO Manual (different brand from HXX)

Vevor DRO manual

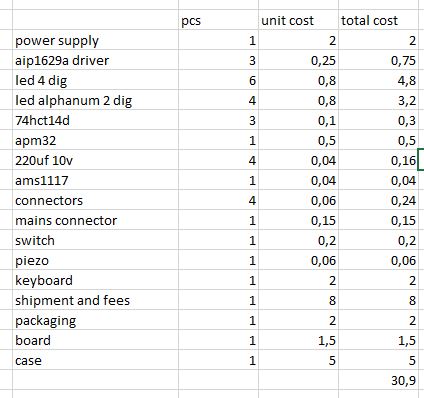
A little study of the parts cost: probably hard to have less than 30 EUR in material, even considering mass production parts cost. If you buy the parts retail, easily already 50 EUR just in parts.
There is still the holder, wall bracket, two large screws and nuts, and related hardware that may cost another 3-4 EUR. Hard to believe that such device can be made, marketed, sold, shipped and supported (by an estimated 5-10 min of customer support time) at a profit to the HXX company.

While the cheap parts and microprocessor and such cause no harm, there are two items that are a little “cheap”. Firstly, there is no filter foil for the display, and while it is bright green, the contrast in workshop lighting is not that great. Would be nice to have a green filter to improve readability. Secondly, the case is made of reasonably solid plastic, probably ABS, but some high-end DROs have cast aluminum cases that will survive in rough workshop environments better than a plastic display. For hobby use and for workshops that take care of their equipment, plastic will be good enough for a long time, certainly more durable than some of the recent touch screen DROs or DROs with fancy LCD screens that will fail after a few years of use.

All in all, very happy with the purchase, and speeding up my work. Many Thanks to the HXX company to provide such a nice instrument for an affordable price.

Note: to reset all options to factory conditions, there is password required. My unit had password “2000” when received.

Recently, I have also scanned to original paper manual that came with the unit.

HXX DRO GCS900 Manual

HXX GCS900 DRO Manual (compressed version)

Cooking 1&1: Pickled cucumbers

Every year the same question: how much salt and vinegar to add to pickled cucumbers. So, once and for all, here is the time-proven recipe:

Cut the cucumbers (peeled and seeds removed) in approx. 1 cm slices and cut in half.

for 1 L of liquid, take:
25(-35) g of salt
(17-)20 g of pure acetic acid (i.e., 80 g of plain 25% concentrated white vinegar, or 400 mL of plain 5% vinegar)
20 g of sugar
4 g of “Gurkenfest” — this will make the cucumber pieces firm and they will keep for a long time
Add some pepper seeds, bay leaves, as you like. I don’t add much.

Alternatively, you can also use 35 g salt, 17 g of pure acid content, for a more salty taste (I prefer more acidic taste for these cucumbers).

Boil thoroughly for 6 minutes at least.

Fill into jars (sterilized by boiling in water for some minutes) and close immediately (turn upside down, let it cool down).

Better not to prepare more than about 1.5~2 L at once, otherwise it is difficult to fill the jars fast enough, or the cucumbers may be overcooked, unless you are working in a rush.

1 L is typically enough for 1.5 kg of cucumbers.

Surely you could also fill the jars cold, and sterilize 25-30 min at 85-90°C.

Siemens Master Clock: Revision 2

This clock has now been in my possession for close to 10 years, it is a Siemens master clock with 3/4 invar pendulum. It is a nice clock, but also needs some repairs at times, especially, the contact wear out or get dirty over time so every two or three year it needs adjustment, cleaning and so on. Another issue is the noise every minute, which is caused by an electromagnet driving the winding mechanism.

There are many contacts and all these need to work, also the main gear of the second hand is triggering a contact, which is known to have an adverse effect on the clock stability, by putting extra load (losses) on the pendulum.

So, we have to re-configure the winding mechanism, and I decided to use a maintenance-free stepper driver. Like those used in old floppy disk drivers.

Only needed to fabricate a metal bracket to mount it to the clockworks. Needless to say, no modification of the clock has been made, I just made use of the existing holes and screws.

To indicate the fully-wound position of the clock, there is normally another set of two contacts that stop the magnet from further winding up the clock. However, also these need some cleaning and adjustment at times, so I replaced them with a inductive proximity sensor.

The sensor has a M8x1 thread, so a mounting bracket can be easily fabricated from some brass.

To control the stepper motor, the winding mechanism, and the second’s pick up (a simple light gate with some comparator circuit), a electronics board is in place, using an ESP32 microcontroller that include a WLAN interface.

The circuit is fairly straightforward. The stepper is driven by a 4-phase uni-polar driver, which has some resistors and diodes, and current switched by darlington transistors. The current per phase is roughly 120 mA, and only one phase active per step, operating in full-step mode with 200 steps/rev. Timing is roughly 10 ms per step.

Power is obtained from 9 VAC power, but the circuit will accept DC or AC, any polarity. A DS18B20 is used for temperature sensing. I am thinking about adding a BMP180 barometric sensor to the circuit, but now that everything is running nicely, I don’t want to disturb the clock. In any case, the circuit is connected to the clock by a 15-pin SUB-D plug, so it can be removed from the clock without removing the dials or anything else.

So I can run a small web interface which is polled every 10 minutes by my main server, to get the current time deviation of the clock, and its temperature.

The adjustments were very easy, and it only took a day to get the clock working to within 1 sec/day deviation. Let’s see if there is some drift developing over time.

The software gave me quite a hard time initially, because the motor control is interacting with the pick up of the pendulum (the light gate signal wire and the motor wires with inductive currents all installed parallel and powered from the same supply, so there were some false counts. Now the timing is such that the winding happens in the dead time, i.e., after a “tick” of the pendulum, and well within the time to the next “tick” (tick-tock-tick-tock spaced 0.75 seconds, so it is 40 ticks per minute for the 3/4 pendulum). That solved the false-count issues altogether, and still I am using a filter algorithm to reconstruct the action pendulum motions perfectly fine, even if one tick would be missed, etc.

HP 8754A Network Analyzer: gold, sapphire and still low output

Some performance validation of the recently fixed 8754A revealed that the output is leveled at 0 dBm, but it doesn’t provide any more than 2 dBm, when you turn the knob to higher levels… it should provide at least +10 dBm leveled, and +13 dBm typical.

So, what is wrong? The signal source is mostly located on the A7 assembly, two VCOs, a mixer, and several amplifiers and levelers.

The osciallator is working, as we can see, but the amplifier circuit, a golden box, number 5086-7235, is not amplifying sufficiently. HP did not consider this field-repairable, so the manual only has some rough information about its contents.

To find out more, we need to crack it open – it is not welded, but glued with a generous amount of silver epoxy.

From right to left, the preamplifier, a filter (LC low pass to remove the VCOs and higher mixer products), and the power amplifier with detector and a -20 dB tap for the PLL-marker circuit.

I checked all the bias voltages and currents, these seem OK. The main amp substrate (sapphire?) has a crack, but is it not fully going through the material, and the gold layer is thick, and the crack is not cutting through the critical sections.

The filter inductances, gold traces on alumina, with some bonding wire. I assume, hand made… It is a pitty I don’t have a microfabrication facility at my disposal, and a wire bonding machine…

Various testing has been performed, to find out the power levels, using a 50 MHz precision source, and a fine tipped probe to check the levels on the substrate (using a microscope, and a steady hand to avoid damaging the bond wires).

From the data it is obvious that the preamp is not amplifying, but absorbing power. This is good and bad, because the final amp needs to provide clean amplification to avoid spurious, so I don’t want to mess with it, and there is also the detector diode, which is essential for the flatness of the unit, also something that is not easily fixed, if you introduce some parasitic resonances or the like.

The fix – scraped off the transistors and most of the gold from the preamp, and soldered a short wire across the substrate, I think it is about 50 ohms impedance. Then, I inserted a set of 2 integrated microwave amplifiers (a MSA-0505 and MSA-0386) to provide about 19 dB gain.

The maximum output +13 dBm at virtually all frequencies (a small dip around 1 GHz).

A test at various power levels, with a good spectrum analyzer (don’t have a calibrated power meter here, but this analyzer is pretty well calibrated). Amplitude is 1 dB per division. The 8754A is calibrated at 0 dBm and 10 dBm, at 50 MHz.

0 dBm leveled output, 1 to 1400 MHz… pretty good.

10 dBm output, also, great flatness.

Finally, at test at 5 dBm – it’s accurate and flat!

Now, we will let this run for several hours at maximum output, to see if the repair is permanent, then the amps will be sealed with epoxy (just plain epoxy, no silver epoxy).

Agilent 4352B VCO/PLL Signal Analyzer: a great find (hopefully!)

I found a great deal on a “totally faulty” 4352B, well, it is a bit a cat in a sack, as we say in Germany, you never know what you get. It shipped from Manila, even better! List price, I think it was close to USD 50k!

It’s a clean unit, except for about 100 stickers and seals!

All heavily shielded, many kinds of screws and metal plates to keep to good waves in, and the bad waves out.

The brain of the machine – quite sophisticated – Japanese engineering (this unit has been manufactured by HP Japan!).

After some study and test, it is clear, it is dead because there just isn’t any power. The power supply is a two-stage supply, first stage, a switchmode universal voltage to 24 Volt (190 Watt) supply, bz maker Artesyn, then a really top quality 2nd stage, made by Agilent. And guess what, the 24 Volt supply is faultly!

This supply uses power factor correction, and two IRFBE30 MOSFETs to drive the transformer – one of them is shorted shot. Otherwise, no damage to be found on the board so far, except the thermal fuse, which must have cut out immediately (even the primary fuse is OK – so there is hope that this will be an easy repair of the 24 V supply).

Ordered some spare thermal fuses and MOSFETs, quite common IRFBE30 type – low cost. Let’s see if this will let us get the power back, if not, worst case, we can always install a new 24 V 200 W supply – there is enough space in the case.

In any case, these VCO analyzers are a great deal – there is a 26.5 GHz (!! APC 3.5 !!) power splitter inside, value, still available today, EUR 1350, and a 13 GHz detector, value, 450 EUR. But let’s keep fingers crossed that this won’t become a parts unit anytime soon.

Moving to Japan: Busy times…

Recently, not so much activity in the workshop, for a simple reason – I was moving to Japan. Still keeping the German main workshop, it is only a temporary work assignment, but temporary can mean two or three years in this case. Anyway, Japan is a great place and this move is to the real Japan, Ube, Yamaguchi, not some expat community in a big international city.

With the help for kind colleagues and the big enterprise, all has been set up in the meantime and life is carrying on along the usual path…

The Japanese house, it is of traditional style, which means, it is hot in summer and cold in winter, but at least you get a better connection to nature, and it is a very healthy life to have fresh air and wind moving trough the big open windows rather than to sit in a hermetically close skyscraper.

Not to miss, the Japanese garden!

… Vegetable garden …

The temporary workshop – I can’t go to such far away places without at least a phase noise measurement test set.

My latest acquisition, an electro-mechanical device called “Toyota Aqua”, aka Prius C – very good fuel efficiency, thanks to its hybrid drive train. Sorry, no service manual for this one but it’s great to explore the beauty of Yamaguchi Prefecture.

Historic view of the workshop – Joh. Eisele Porzellan Grosshandel, Ludwigshafen

Found this great view of the current workshop (ground floor, left windows), dating back to before 1918! The building itself dates back to 1910, established by Joh. Eisele, who used to operate a major trading house for porcelain, glass, and stone ware, including a decoration workshop for such items.

While the back factory (with the railway tracks) is missing today (maybe bombed out it WW II?), the main building still exists today, in quite recognizable shape and form, even still with the name of Joh. Eisele in golden letters!