
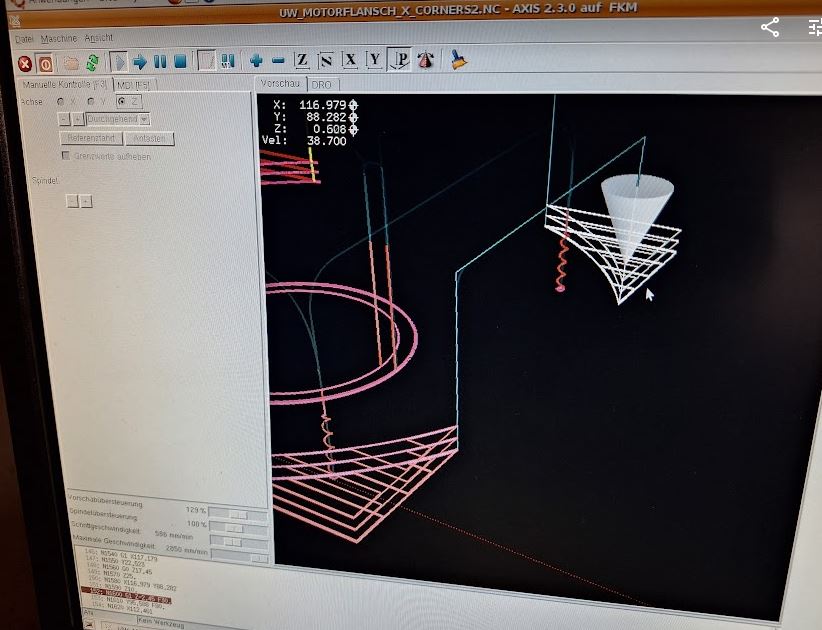
For the X (ball screw driven left and right) and A (rotary) axes, now as the servo motors have arrived, we need to find a way to mount the servos to the existing drive mechanism. My intention is not to modify any of the shafts and precision parts of the Saacke machine, but to determine a way to mount the servos with high precision of axis alignment, and a coupling that can transmit the torque without slop or delay.
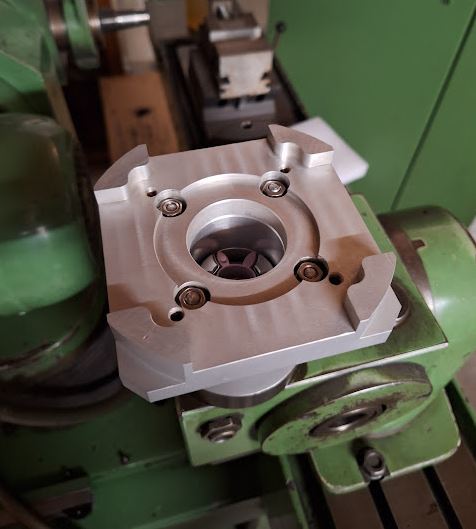
The mechanical parts and brackets, I decided to use aluminum alloy rather than steel, even Saacke manufactured the stepper motor mounting plate for the A axis from aluminum plate, and the strength will be good enough, with no need to paint or oil the necessary adapter plates.
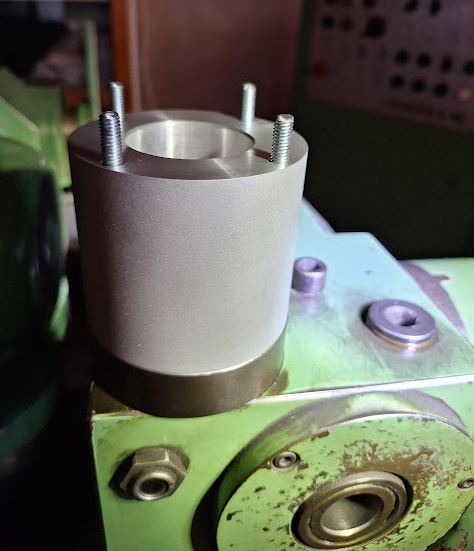
The couplings, I used KTR Rotex, size 19, with 92 Shore TPU elastomeric couplers. These were available already machines to the right size, including matching keyways. Found them used, or old stock, a good deal.

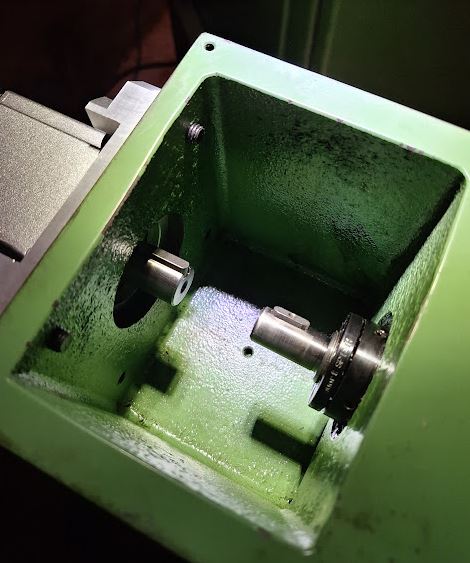
To house the coupling, made a cylinder from aluminum alloy, and 4 holes drilled for draw-bolts. The draw-bolts screw into the A-axis head, and nuts will be used in the servo mounting plate to hold things together.
The servo mounting plate required quite some planning to match both the machine side, the servo flange, and the fan cover (which I plan to re-install to protect the servo – the cooling fan doesn’t seem to be required).

For the connection of the coupling and the head drive, made a rod with a long key slot (formerly, the long shaft of the stepper motor was directly fitting into the A axis drive head.

Fortunately, all the parts fit right away, torqued the draw-bolts carefully, and adjusted the couplings for proper clearance. There was a little slop in the coupling, so I bent some thin shim stock to pre-tension the polymer coupler a little more.
The distances and plate thickness was designed such that there is enough strength, without adding to much weight or unnecessary stick-out.
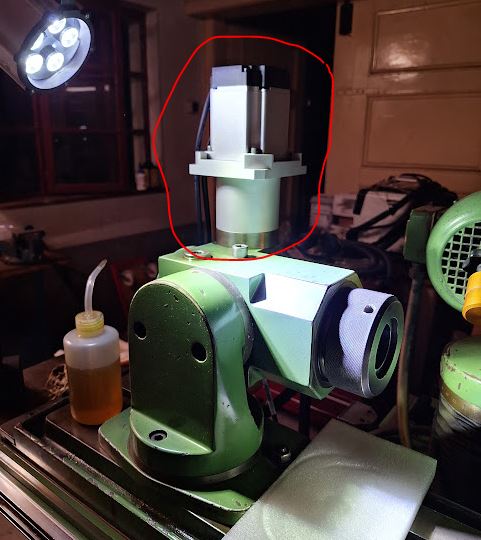
The fan cover, steel, had some other fans originally that you damaged during transport, and the adjustments for new fans were done by hand before, now a good chance to clean these (grit and dust filled) covers (there purpose was to direct the fan air around the stepper motors), and to mill out a little more space for the cables.
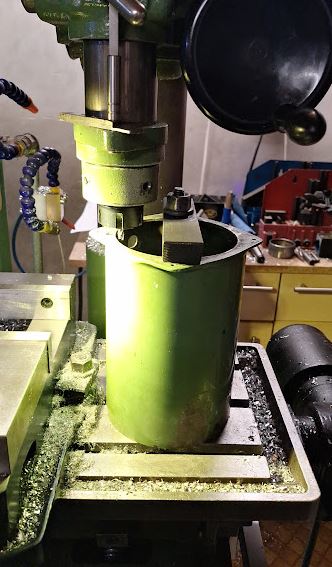
Handy to have the manual mill, and various workpiece holding.

With the cover mounted, all looks nice and neat, and overall a few kgs lighter compared to the former stepper motor. The cover is held in place by 4 screws, radially arranged, that have steel (stainless) spheres pushing onto the servo.

For the X axis, similar case, programming the CNC code, milling the aluminum plates. These mill jobs took a little while with some many features, but no purpose to optimize the program for a single piece.
There was no need to drill new holes, the plate was made such that the existing stepper motor threaded holes can be used.

The spindles shaft and the servo shaft have different diameter and key size, but also here I was able to find suitable KTR Rotex couplings.
With the cover, it looks like not much has changed vs. the stepper motor, and there is still enough space for the cables (drive cable 3 poles plus ground and encoder cable – 2 twisted pair plus shield).
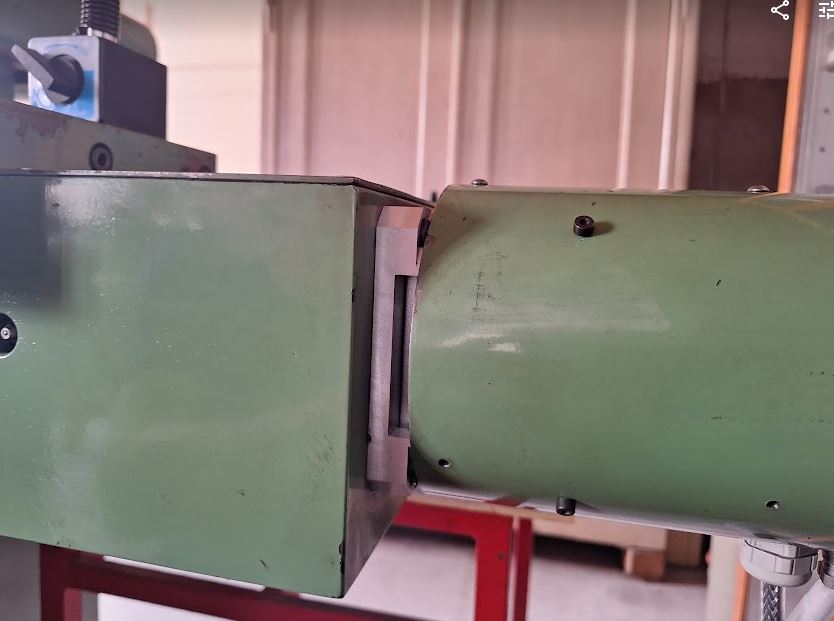
With all the work on the X axis, I used the chance to clean the screw bearing thoroughly, and adjusted the ball screw precisely (with a micrometer resolution dial on the table, and checking the pre-tension), but also found that the bellow cover is was badly worn, full of grease and dirt.

Finding a replacement bellow cover, from the original manufacturer, a German company, I was not even able to get a quotation, which would likely be cost-prohibitive anyway. Looking through Aliexpress, found a very cooperative supplier in China – this company provided a custom made cover for just about 30 EUR, shipping to Germany included (no customs to be paid). They were not able to provide small “tabs” at the side to hold the bellow cover in place, therefore I cut some from PVC plate, white color was the only thing I had available – but it will not be visible once installed anyway. Using special PVC glue, which really softens the plastic and welds it firmly, these plates were attached with very good strength. Also made a test piece, and could not actually break the glue joint without destroying the whole piece.

Installation of the bellow cover was easy – some small brackets and 3 screws each side, and the dimensions fit well. The material of the Chinese supplier seems pretty durable, oil and solvent resistant material, and many PVC frames (in each fold) to make it stiff and keeping shape. Let’s see how it will perform over the years.